112 lines
11 KiB
Markdown
112 lines
11 KiB
Markdown
# Using custom connectors
|
|
If our connector catalog does not fulfill your needs, you can build your own Airbyte connectors.
|
|
There are two approaches you can take while jumping on connector development project:
|
|
1. You want to build a connector for an **external** source or destination (public API, off-the-shelf DBMS, data warehouses, etc.). In this scenario, your connector development will probably benefit the community. The right way is to open a PR on our repo to add your connector to our catalog. You will then benefit from an Airbyte team review and potential future improvements and maintenance from the community.
|
|
2. You want to build a connector for an **internal** source or destination (private API) specific to your organization. This connector has no good reason to be exposed to the community.
|
|
|
|
This guide focuses on the second approach and assumes the following:
|
|
* You followed our other guides and tutorials about connector developments.
|
|
* You finished your connector development, running it locally on an Airbyte development instance.
|
|
* You want to deploy this connector to a production Airbyte instance running on a VM with docker-compose or on a Kubernetes cluster.
|
|
|
|
If you prefer video tutorials, [we recorded a demo about uploading connectors images to a GCP Artifact Registry](https://www.youtube.com/watch?v=4YF20PODv30&ab_channel=Airbyte).
|
|
|
|
## 1. Create a private Docker registry
|
|
Airbyte needs to pull its Docker images from a remote Docker registry to consume a connector.
|
|
You should host your custom connectors image on a private Docker registry.
|
|
Here are some resources to create a private Docker registry, in case your organization does not already have one:
|
|
|
|
| Cloud provider | Service name | Documentation |
|
|
|----------------|-----------------------------|--------------------------------------------------------------------------------------------------------------------------------------------------------------------------------------------------------------------------------------------------------------------------------------------|
|
|
| Google Cloud | Artifact Registry | [Quickstart](https://cloud.google.com/artifact-registry/docs/docker/quickstart)|
|
|
| AWS | Amazon ECR | [Getting started with Amazon ECR](https://docs.aws.amazon.com/AmazonECR/latest/userguide/getting-started-console.html)|
|
|
| Azure | Container Registry | [Quickstart](https://docs.microsoft.com/en-us/azure/container-registry/container-registry-get-started-portal#:~:text=Azure%20Container%20Registry%20is%20a,container%20images%20and%20related%20artifacts.&text=Then%2C%20use%20Docker%20commands%20to,the%20image%20from%20your%20registry.)|
|
|
| DockerHub | Repositories | [DockerHub Quickstart](https://docs.docker.com/docker-hub/)|
|
|
| Self hosted | Open-source Docker Registry | [Deploy a registry server](https://docs.docker.com/registry/deploying/)|
|
|
|
|
## 2. Authenticate to your private Docker registry
|
|
To push and pull images to your private Docker registry, you need to authenticate to it:
|
|
* Your local or CI environment (where you build your connector image) must be able to **push** images to your registry.
|
|
* Your Airbyte instance must be able to **pull** images from your registry.
|
|
|
|
### For Docker-compose Airbyte deployments
|
|
#### On GCP - Artifact Registry:
|
|
GCP offers the `gcloud` credential helper to log in to your Artifact registry.
|
|
Please run the command detailed [here](https://cloud.google.com/artifact-registry/docs/docker/quickstart#auth) to authenticate your local environment/CI environment to your Artifact registry.
|
|
Run the same authentication flow on your Compute Engine instance.
|
|
If you do not want to use `gcloud`, GCP offers other authentication methods detailed [here](https://cloud.google.com/artifact-registry/docs/docker/authentication).
|
|
|
|
#### On AWS - Amazon ECR:
|
|
You can authenticate to an ECR private registry using the `aws` CLI:
|
|
`aws ecr get-login-password --region region | docker login --username AWS --password-stdin aws_account_id.dkr.ecr.region.amazonaws.com`
|
|
You can find details about this command and other available authentication methods [here](https://docs.aws.amazon.com/AmazonECR/latest/userguide/registry_auth.html).
|
|
You will have to authenticate your local/CI environment (where you build your image) **and** your EC2 instance where your Airbyte instance is running.
|
|
|
|
#### On Azure - Container Registry:
|
|
You can authenticate to an Azure Container Registry using the `az` CLI:
|
|
`az acr login --name <registry-name>`
|
|
You can find details about this command [here](https://docs.microsoft.com/en-us/azure/container-registry/container-registry-get-started-portal#:~:text=Azure%20Container%20Registry%20is%20a,container%20images%20and%20related%20artifacts.&text=Then,%20use%20Docker%20commands%20to,the%20image%20from%20your%20registry.)
|
|
You will have to authenticate both your local/CI environment/ environment (where your image is built) **and** your Azure Virtual Machine instance where the Airbyte instance is running.
|
|
|
|
#### On DockerHub - Repositories:
|
|
You can use Docker Desktop to authenticate your local machine to your DockerHub registry by signing in on the desktop application using your DockerID.
|
|
You need to use a [service account](https://docs.docker.com/docker-hub/service-accounts/) to authenticate your Airbyte instance to your DockerHub registry.
|
|
|
|
#### Self hosted - Open source Docker Registry:
|
|
It would be best to set up auth on your Docker registry to make it private. Available authentication options for an open-source Docker registry are listed [here](https://docs.docker.com/registry/configuration/#auth).
|
|
To authenticate your local/CI environment and Airbyte instance you can use the [`docker login`](https://docs.docker.com/engine/reference/commandline/login/) command.
|
|
|
|
### For Kubernetes Airbyte deployments
|
|
You can use the previous section's authentication flow to authenticate your local/CI to your private Docker registry.
|
|
If you provisioned your Kubernetes cluster using AWS EKS, GCP GKE, or Azure AKS: it is very likely that you already allowed your cluster to pull images from the respective container registry service of your cloud provider.
|
|
If you want Airbyte to pull images from another private Docker registry, you will have to do the following:
|
|
1. Create a `Secret` in Kubernetes that will host your authentication credentials. [This Kubernetes documentation](https://kubernetes.io/docs/tasks/configure-pod-container/pull-image-private-registry/) explains how to proceed.
|
|
2. Set the `JOB_KUBE_MAIN_CONTAINER_IMAGE_PULL_SECRET` environment variable on the `airbyte-worker` pod. The value must be **the name of your previously created Kubernetes Secret**.
|
|
|
|
## 3. Push your connector image to your private Docker registry
|
|
1. Build and tag your connector image locally, e.g.: `docker build . -t my-custom-connectors/source-custom:0.1.0`
|
|
2. Create your image tag with `docker tag` command. The structure of the remote tag depends on your cloud provider's container registry service. Please check their online documentation linked at the top.
|
|
3. Use `docker push <image-name>:<tag>` to push the image to your private Docker registry.
|
|
|
|
You should run all the above commands from your local/CI environment, where your connector source code is available.
|
|
|
|
## 4. Use your custom connector in Airbyte
|
|
At this step, you should have:
|
|
* A private Docker registry hosting your custom connector image.
|
|
* Authenticated your Airbyte instance to your private Docker registry.
|
|
|
|
You can pull your connector image from your private registry to validate the previous steps. On your Airbyte instance: run `docker pull <image-name>:<tag>` if you are using our `docker-compose` deployment, or start a pod that is using the connector image.
|
|
|
|
### 1. Click on Settings
|
|

|
|
|
|
|
|
### 2. Click on Sources (or Destinations)
|
|

|
|
|
|
|
|
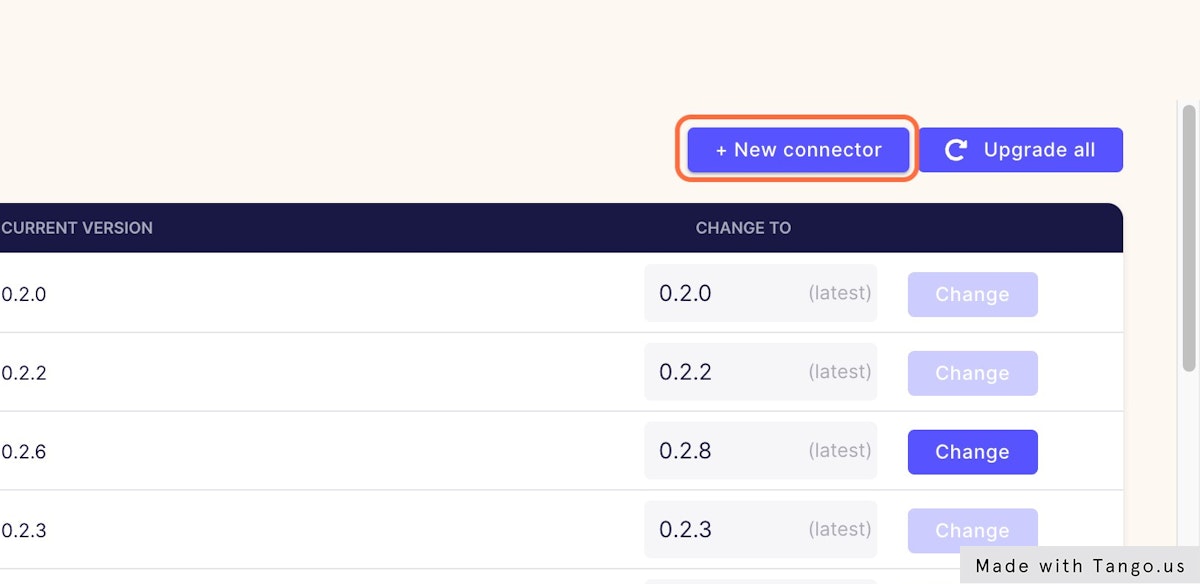
### 3. Click on + New connector
|
|
|
|
|
|
|
|
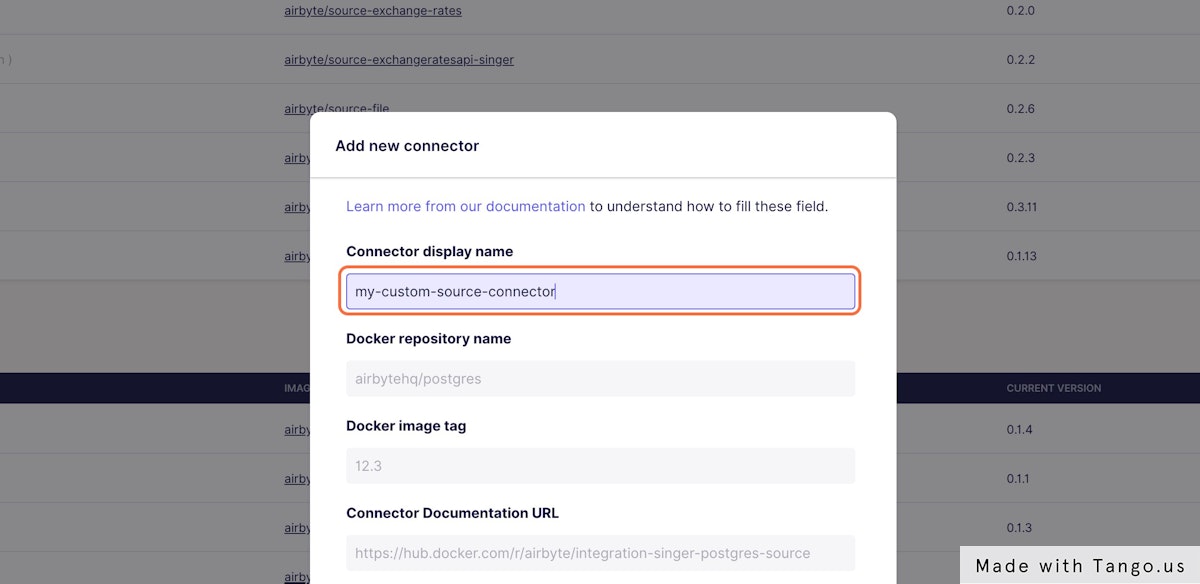
### 4. Fill the name of your custom connector
|
|
|
|
|
|
|
|
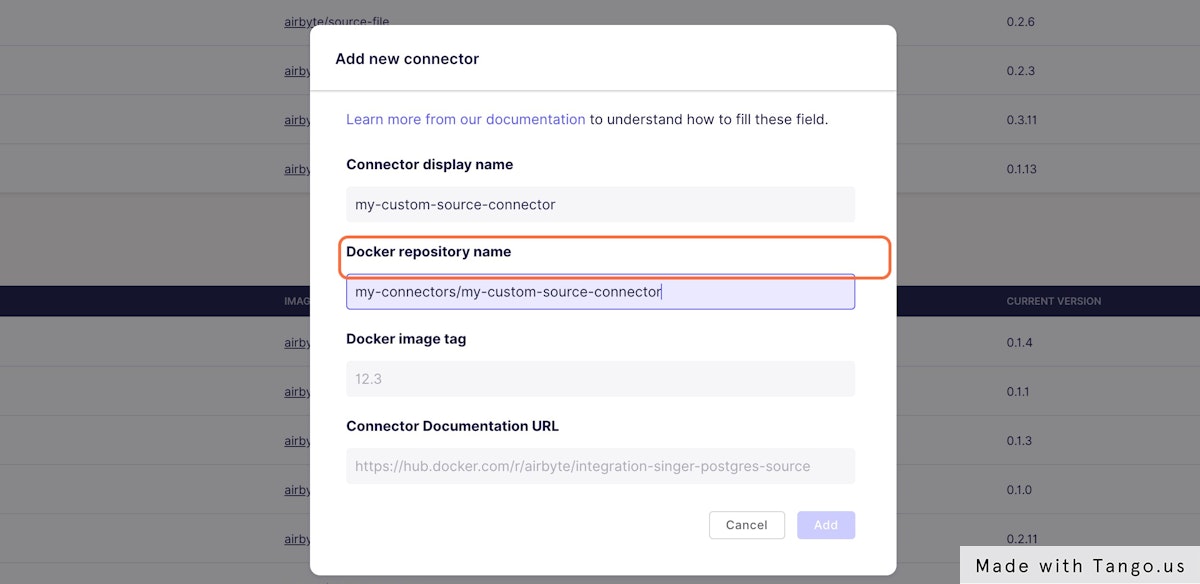
### 5. Fill the Docker image name of your custom connector
|
|
|
|
|
|
|
|
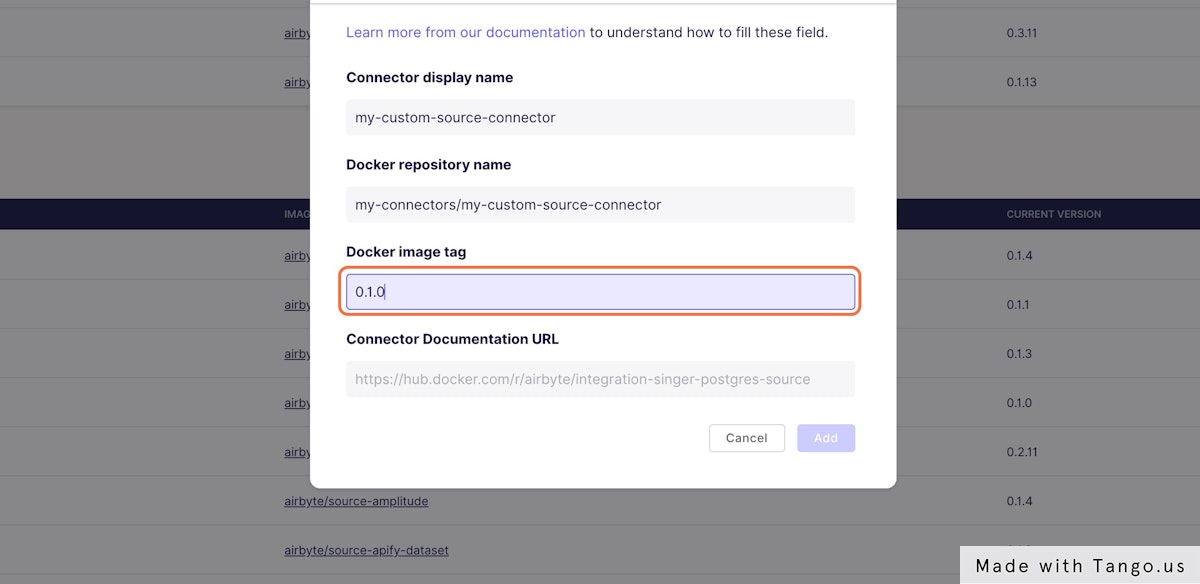
### 6. Fill the Docker Tag of your custom connector image
|
|
|
|
|
|
|
|
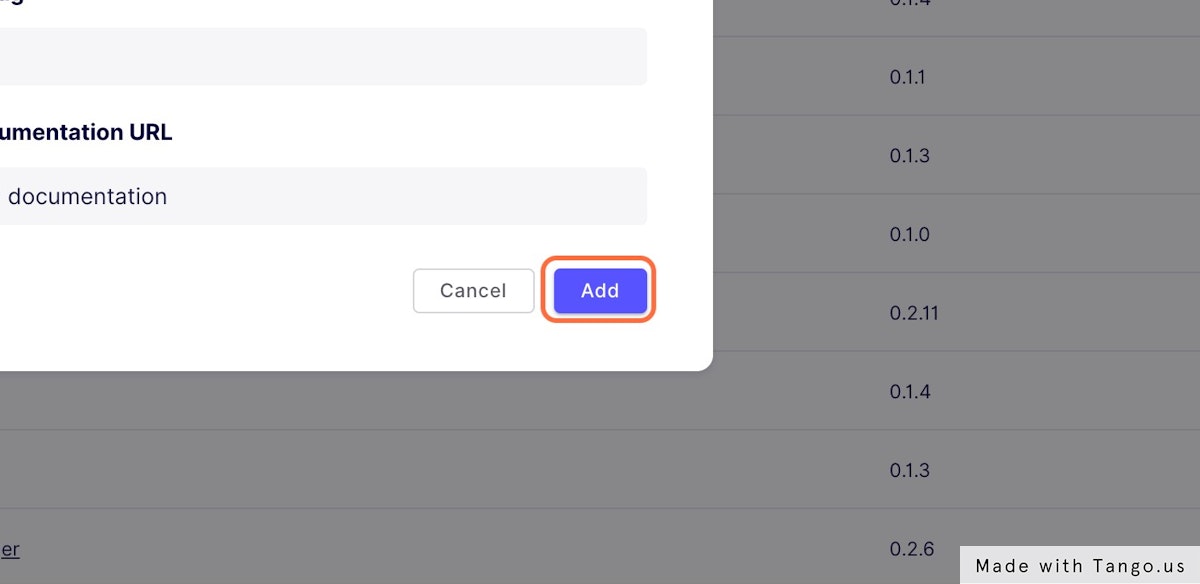
### 7. Fill the URL to your connector documentation
|
|
This is a required field at the moment, but you can fill with any value if you do not have online documentation for your connector.
|
|
This documentation will be linked in the connector setting page.
|
|

|
|
|
|
|
|
### 8. Click on Add
|
|
|